

How to Turn Garden and Kitchen Waste into Black Gold – the Easy Way
If you’ve ever wanted to start composting but felt overwhelmed by the science of hot heaps, thermometers, and turning schedules, cold composting is your new best friend. It’s simple, low-maintenance, and incredibly rewarding—perfect for beginner gardeners, allotmenteers, and anyone keen to reduce household waste.
In this beginner’s composting guide, we’ll walk you through what cold composting is, how it works, what to include (and avoid), and how to get started—even if you only have a small garden or patio.
What Is Cold Composting?
Cold composting is the slow, natural decomposition of organic matter without the need for heat or intensive turning. Unlike hot composting—which relies on high temperatures and frequent management—cold composting lets nature take its course. You simply add your waste materials to a bin or pile and wait.
In short:
🌱 Cold composting = no fuss, just patience.
The process typically takes between 6 months and 2 years, depending on your climate, materials used, and how often you mix or water it. While it’s slower, it’s also much more forgiving, making it ideal for busy households or composting novices.
Why Choose Cold Composting?
Here are a few reasons why cold composting might be the right choice for your garden:
✅ Easy to Start
No fancy bins, no temperature checks. You can start with a basic compost heap, a lidded plastic bin, or even a repurposed pallet system.
✅ Low Effort
There’s no need to turn your compost every week. Just add your materials and let them break down over time.
✅ Eco-Friendly
Composting reduces the amount of organic waste sent to landfill, which in turn lowers methane emissions.
✅ Great for Small Gardens
You don’t need loads of space. Even a small compost bin tucked behind a shed or in a corner will do.
How Does Cold Composting Work?
Cold composting is driven by aerobic bacteria, fungi, insects, and worms, all of which naturally break down organic material over time.
The process relies on a balance between two types of waste:
- Greens (Nitrogen-rich): Kitchen scraps, grass clippings, coffee grounds.
- Browns (Carbon-rich): Leaves, cardboard, shredded newspaper, twigs.
The Ideal Ratio
Aim for a mix of roughly 1 part green to 2 or 3 parts brown. This balance ensures good airflow and helps avoid bad smells.
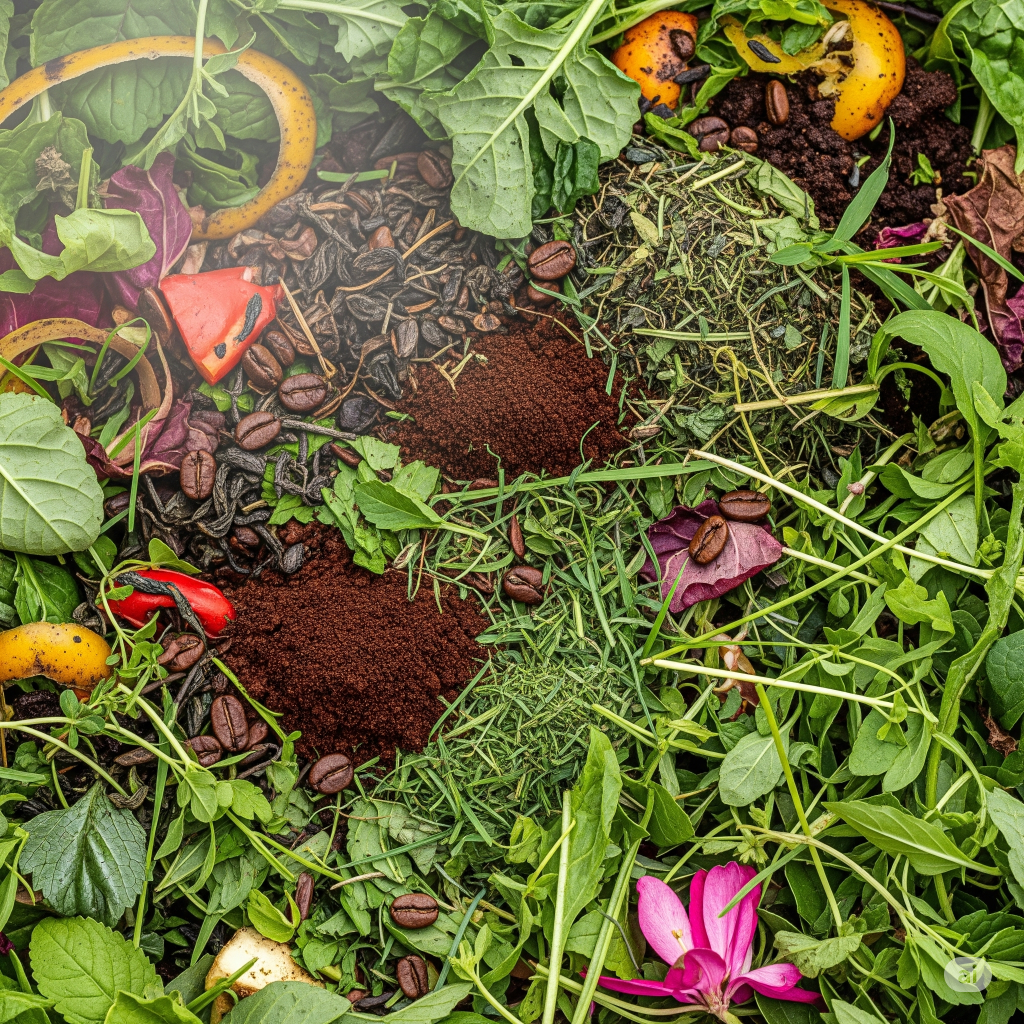
What Can You Compost?
Here’s a breakdown of compost-friendly materials:
✅ Browns (Carbon-Rich)
- Dry leaves
- Straw or hay
- Cardboard (shredded)
- Toilet roll tubes
- Egg cartons
- Sawdust (from untreated wood)

✅ Greens (Nitrogen-Rich)
- Vegetable peelings
- Fruit scraps
- Coffee grounds and tea leaves
- Grass clippings
- Spent annual plants
- Fresh garden trimmings
What NOT to Compost
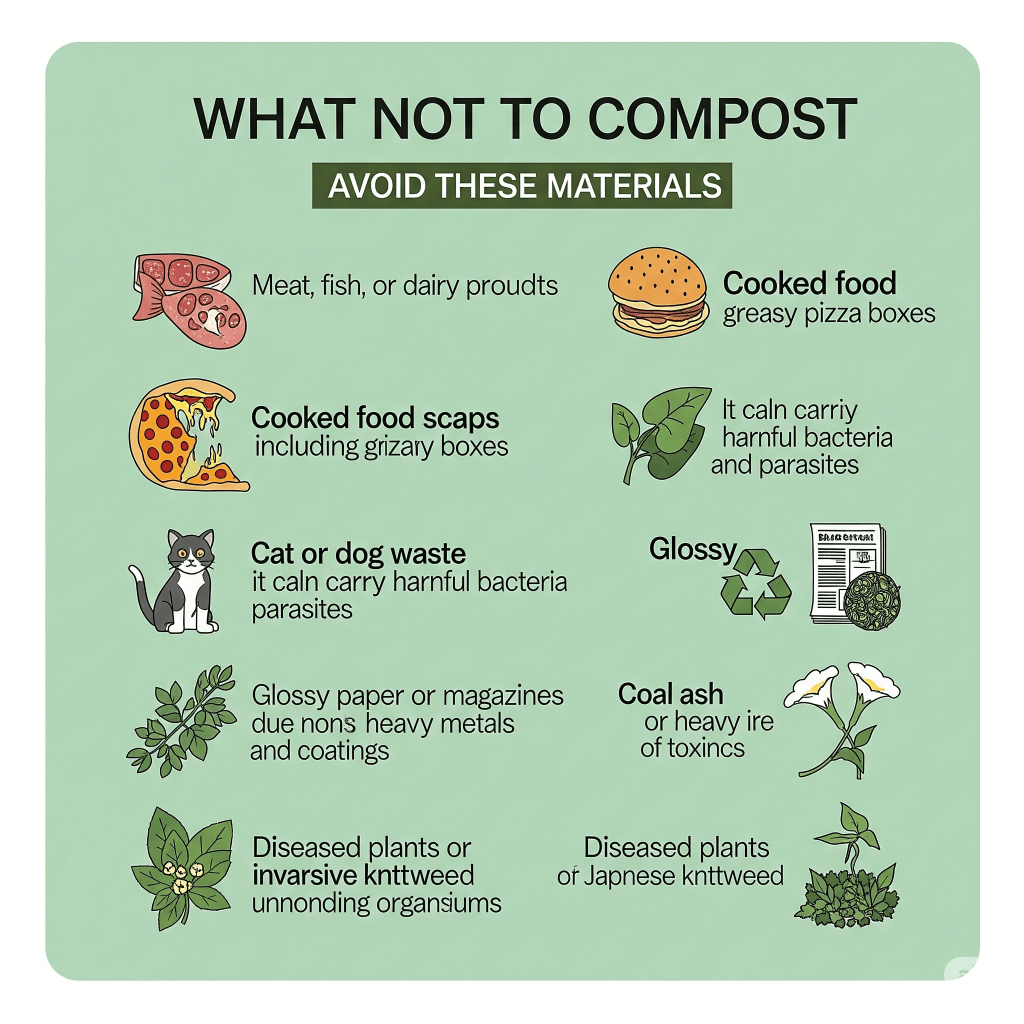
To keep your pile healthy and pest-free, avoid these materials:
🚫 Meat, fish, or dairy
🚫 Cooked food scraps
🚫 Cat or dog waste
🚫 Glossy paper or magazines
🚫 Coal ash
🚫 Diseased plants or invasive weeds (like bindweed or Japanese knotweed)
How to Start Your Cold Composting System
You don’t need much to get started. Here’s a step-by-step guide:
1. Choose a Compost Bin or Spot
You can buy a compost bin (many councils in the UK offer subsidised options) or make one from wooden pallets. Pick a well-drained, level spot that gets some sun.
2. Create a Base Layer
Start with a layer of coarse browns—twigs, straw, or cardboard—to improve airflow and drainage.
3. Add Materials in Layers
Alternate greens and browns to keep the pile balanced. Chop up larger items to speed up decomposition.
4. Keep It Moist (Like a Wrung-Out Sponge)
If your compost is dry, add water. If it’s soggy, mix in more dry browns like shredded cardboard or dry leaves.
5. Optional: Mix Occasionally
Turning your compost every few weeks will introduce air and help speed things up, but it’s not essential with cold composting.
How Long Does Cold Composting Take?
Expect the process to take 6 months to 2 years. The more attention you give it (e.g. balancing materials, mixing, monitoring moisture), the quicker it will decompose.
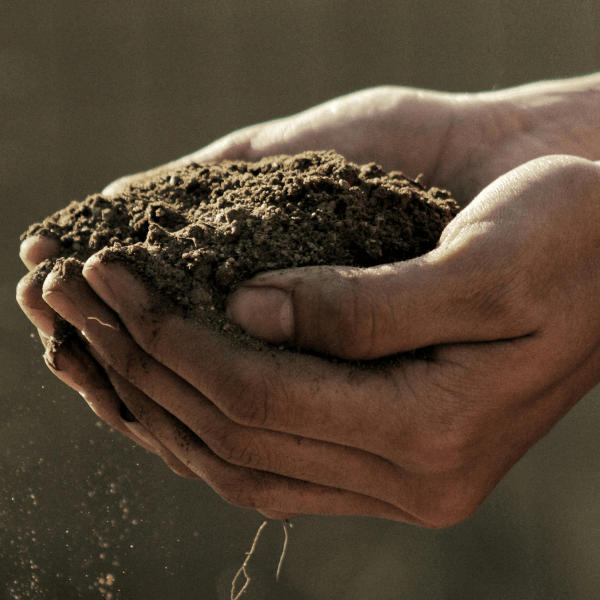
When it’s ready, your compost should be:
- Dark and crumbly
- Earthy-smelling
- Free of recognisable food waste
How to Use Your Cold Compost
Once your compost is ready, you can use it in a variety of ways:
- Mulch around trees, shrubs, and perennials
- Top-dress raised beds and borders
- Improve soil in vegetable patches
- Add to containers for long-term nutrient support
It’s a natural soil conditioner that improves structure, retains moisture, and encourages healthy root development.
Troubleshooting Tips
Here are some common issues and how to solve them:
| Problem | Likely Cause | Solution |
|---|---|---|
| Bad smell | Too many greens / too wet | Add more browns and mix |
| Dry, not breaking down | Too dry | Add water and mix |
| Attracting pests | Wrong materials (e.g. meat) | Stick to veg scraps only |
| Slow decomposition | Cold weather or imbalance | Be patient, or add more greens and mix |
Cold composting is one of the easiest and most rewarding ways to create a healthier, more sustainable garden. It’s the perfect low-effort method for beginners, offering all the benefits of composting without the pressure to “get it right.”
Whether you’ve got a postage-stamp patio or a sprawling allotment, cold composting helps you:
- Reduce waste
- Improve soil
- Grow healthier plants
So why not start today? Grab a bin, save your kitchen scraps, and let nature do the rest.
Recommended Reading & Resources
- How to Build a Pallet Compost Bin
- Cold vs Hot Composting
- Best Compost Bins for Small Gardens – Reviewed
- Green vs. Brown Materials – Compost Cheat Sheet
Written by Max Letek – Garden-Review.co.uk
Helping UK gardeners grow greener, one compost heap at a time.


Leave a comment